iTunes, the heart and soul of an iOS user. iTunes is a humongous store for media files like music, movies, games and so on. As we all know, the beauty of iOS platform is the strongly knitted security. The security is so tough that it often refrains you from viewing your media files on any other platform. But when a user purchases a movie or a video spending bucks from his/her pockets, he/she would want to enjoy full rights over the purchased product. But this freedom is somehow clipped off by DRM. Digital Rights Management or DRM is a set of access controls that constrains the use of proprietary hardware and copyrighted software and media files. If you are looking at it from a security perspective, then of course DRM is great. But from a user point of view, it is not so great. For example, you have purchased a video on iTunes. Would you like to purchase the same video from Play Store with an additional amount? Certainly not. That’s when DRM is a disappointment. DRM technologies gain command over copyrighted media and enforce its policies so that they can’t be misused. DRM is not universally accepted and therefore, software applications to remove DRM protection is legal.
In this article, we are reviewing Tuneskit Media Converter application for Mac. The Mac version of DRM Media Converter is a free downloadable version, which means you don’t have to pay anything but remember, this app will work for OSX version 10.8 to 10.12. If your Mac version is lower or higher than the mentioned range, then this software will not work for you.
Have a look at the basic installation procedure of the application.
Steps to Install and Use Tuneskit DRM Media Converter for Mac
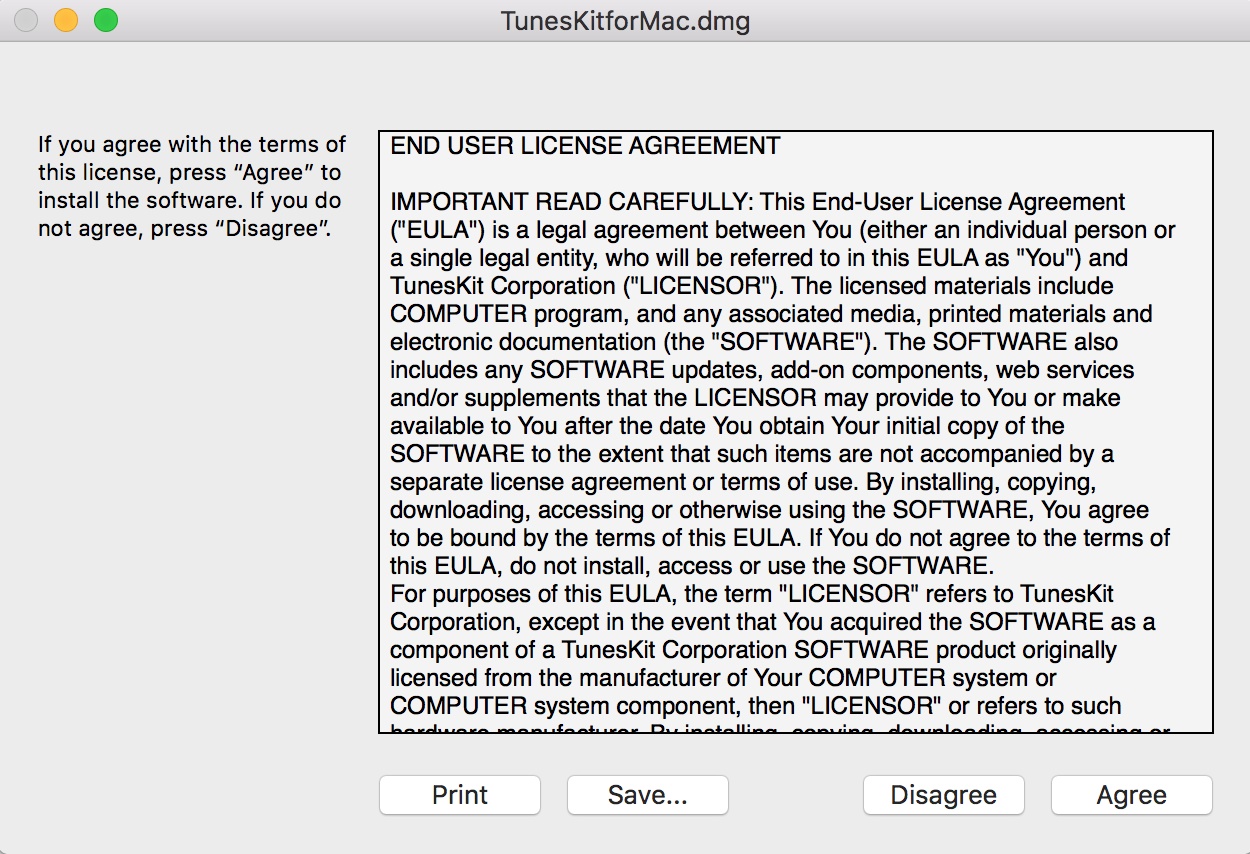
1. First of all, download the TunesKit DRM Media Converter for Mac. It is a free download. Double tap on the app from the downloads on your web browser. As the application starts, it will ask you to accept terms and conditions. So, accept the terms and conditions of the application.
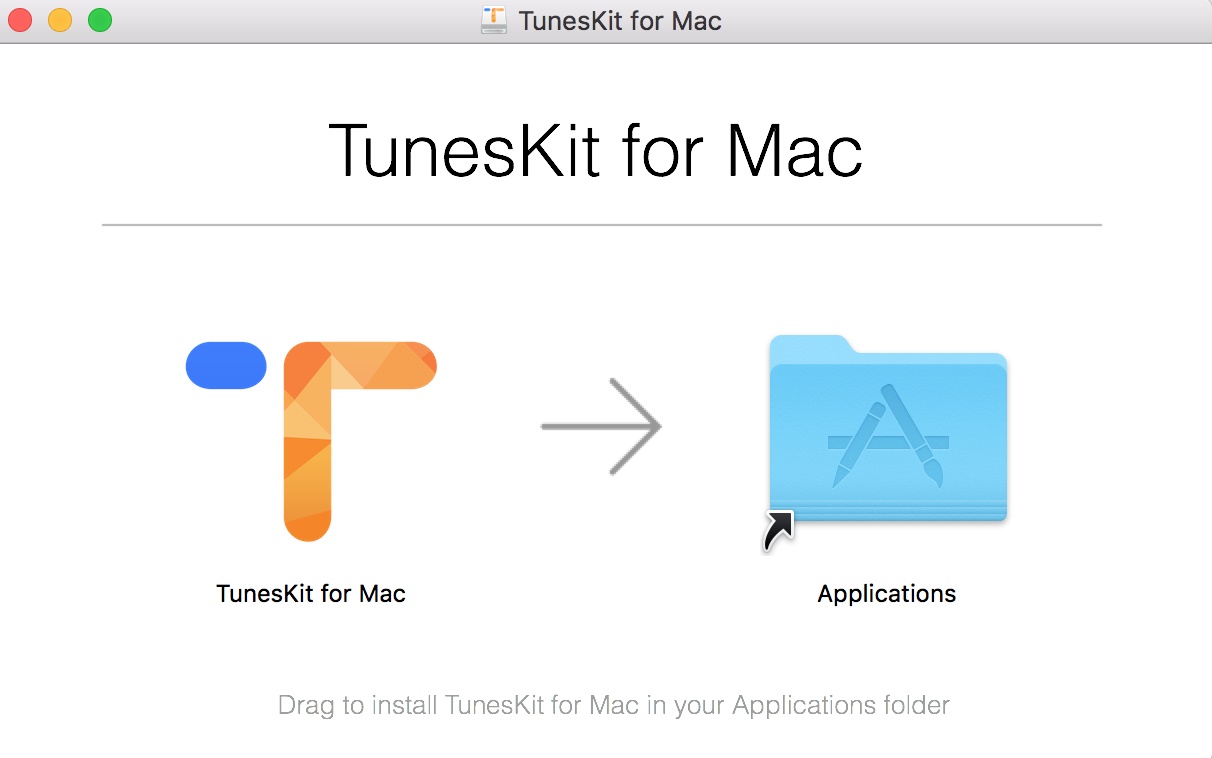
2. Next, you have to drag the app and drop it to the Applications folder.
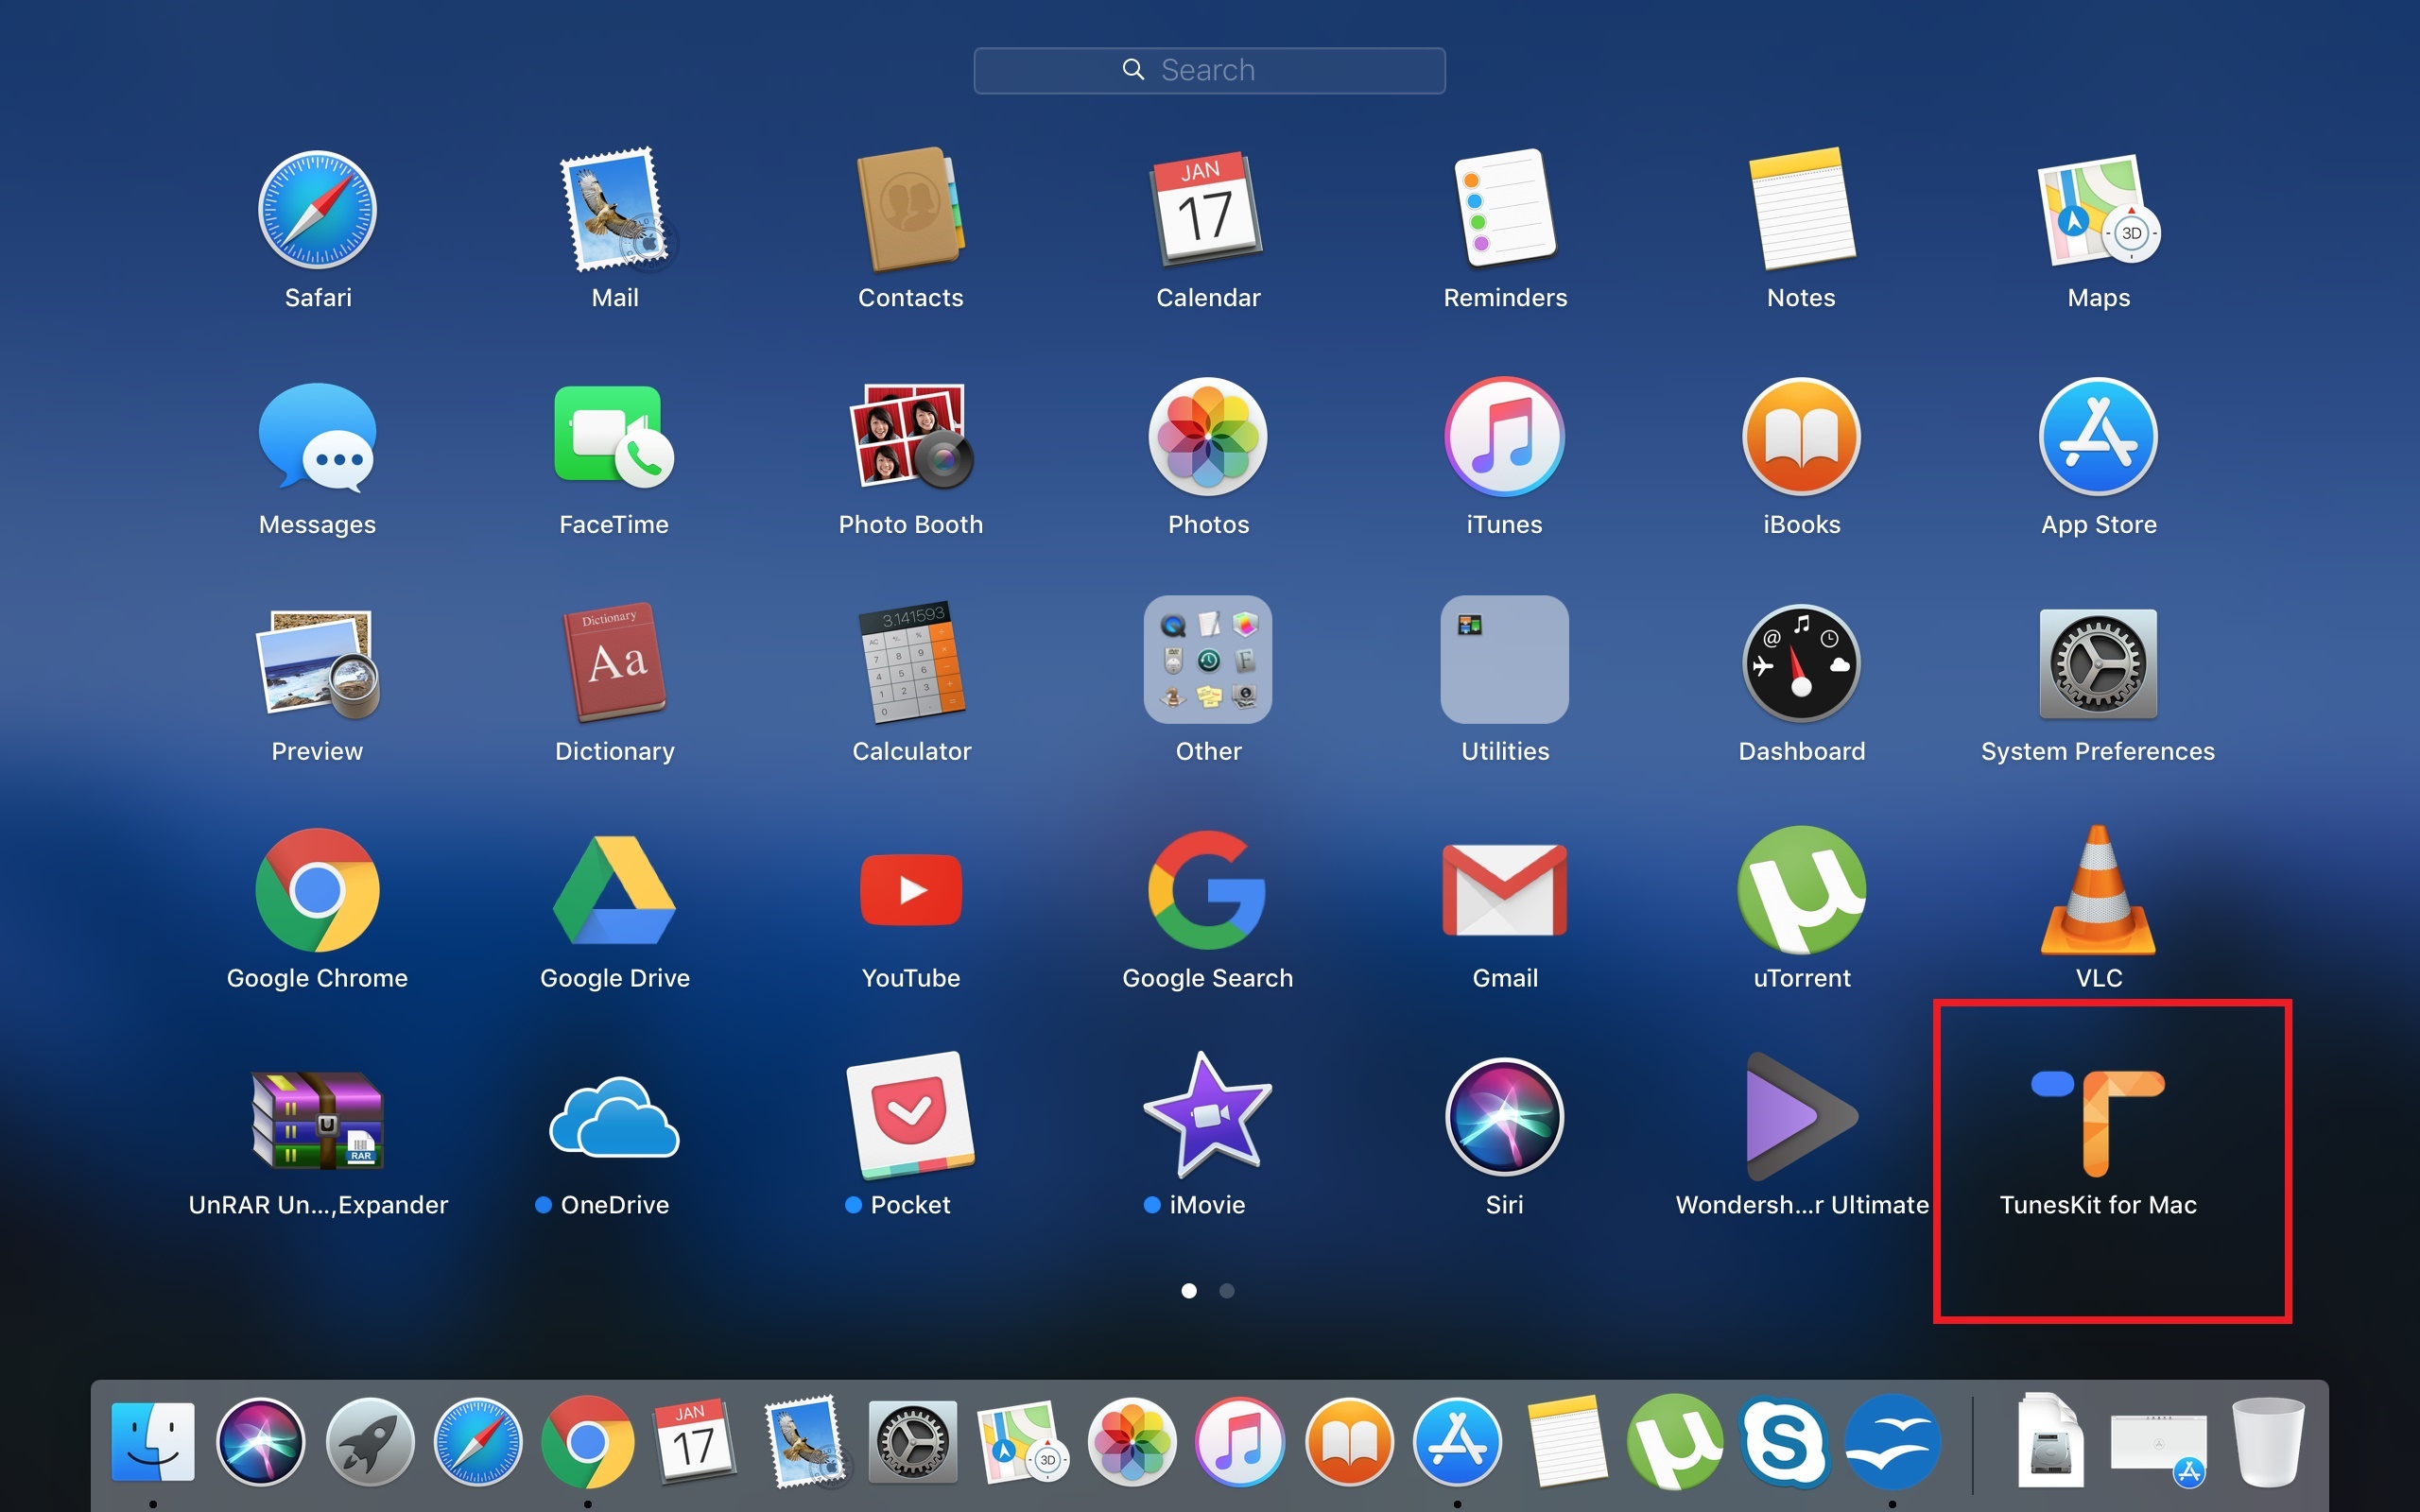
3. As you drop the application to the Applications folder, it will appear in the Launchpad.
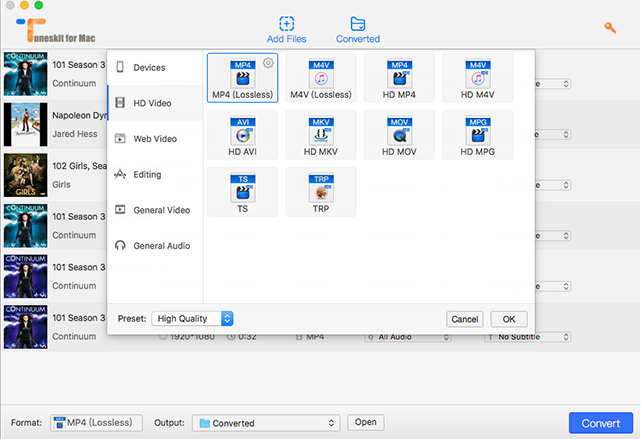
4. Now the TunesKit DRM Media Converter application UI opens. The UI is very clean and simple. You can find the major options. The top panel has two options, Add Files and Converted Files. The Add Files option will let you add the DRM protected video and media files. The converted tab shows you the list of the DRM removed/ converted files. In the lower panel, there are two major options for Output- the Format and Output. To choose the desired output format, tap on the option. You get to choose from a plethora of options like HD Video, Web video, General Video, General audio, etc.
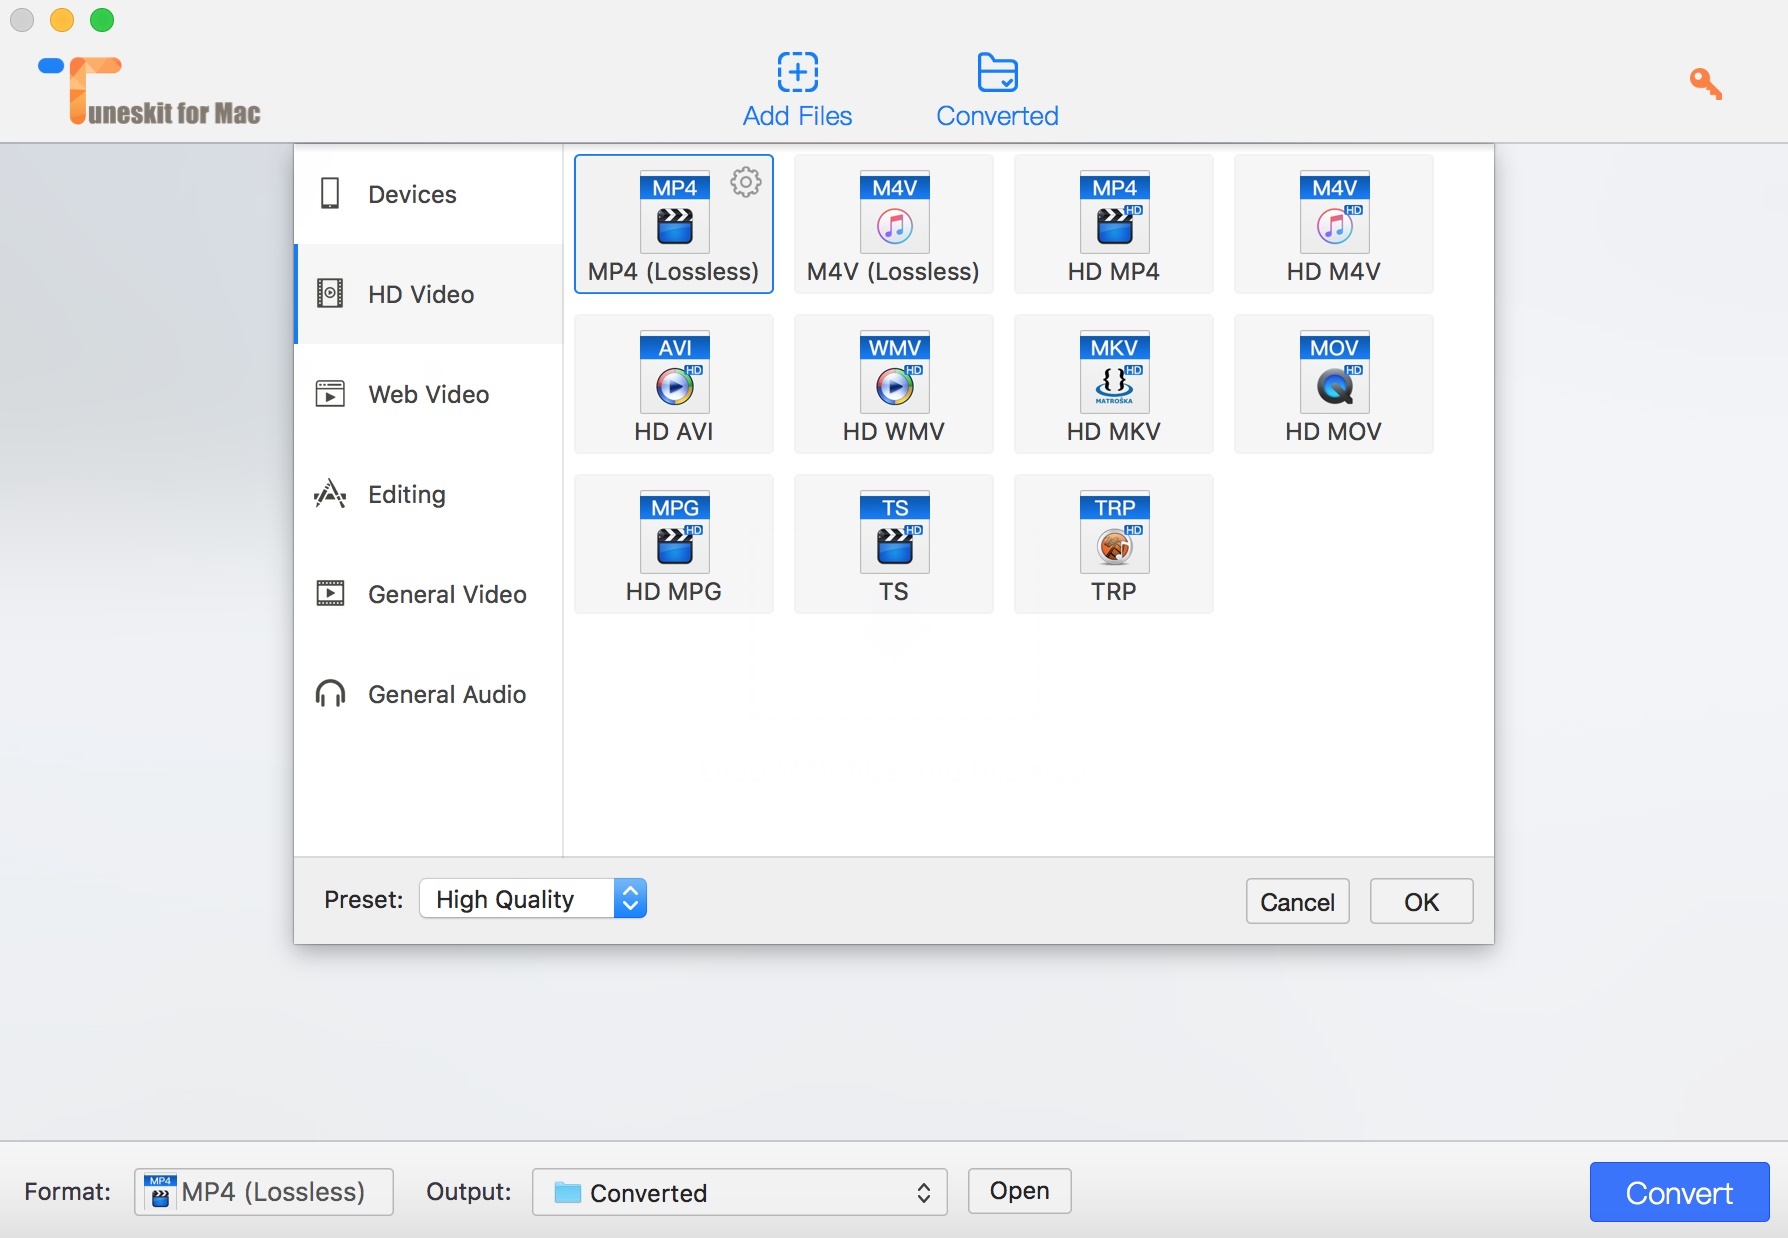
5. Now to add a file, click on Add Files option and the list opens. Now select a DRM protected video that you have purchased. Choose the Output location and format as explained above. Then click on Convert.
That’s all about using the software. Now let’s discuss the pros and cons of the software.
Pros
The UI is very efficiently designed. Not too many unnecessary options cluttering the UI to confuse users.
Cons
Other than this, there is no negative aspect. The company must look into the matter and upgrade the software as soon as possible.




Leave a Reply