‘APN’ is the acronym for ‘Access point name’ and is used to connect a phone to wireless services with all important information. Generally, APN is pre provided in a phone. All you need that just enter a sim card and phone will automatically detect the sim card and synchronized with APN. Now you can make calls, send or receive messages, access net and everything you want. If it does not work automatically do not worry. You can set it up manually from settings option. You can also change APN from settings option.
Steps To Add Or Change ‘APN’ on Android Device?
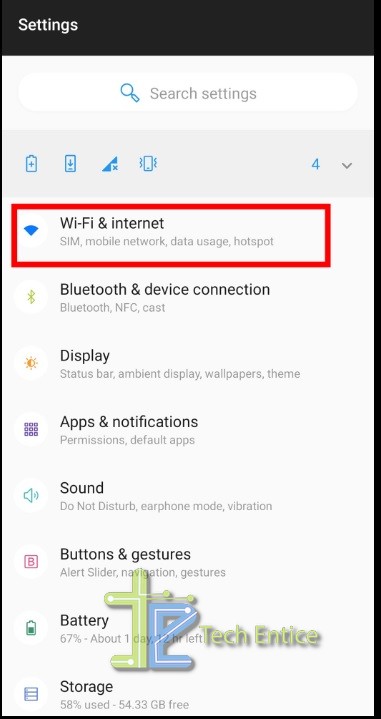
Go to the “Settings” app on your phone. Then click on the option which handles sim, network, internet etc on your phone. The exact list of menu may vary from one manufacturer to the other.
Now choose the option which handles only ‘SIM’ and ‘network‘.
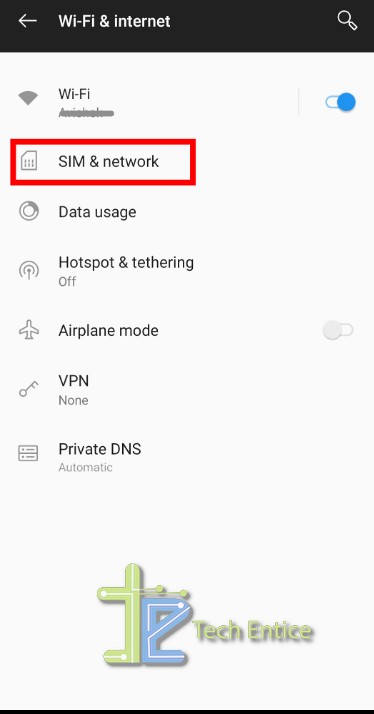
If your phone has dual sim facility then choose the SIM for which you want to add or edit ‘APN‘.

Now you can see some details of the SIM and the option ‘Access Point Names‘. Click on it. The list of ‘APNs’ is showing. Click on the name of APN and you can see the details of it.
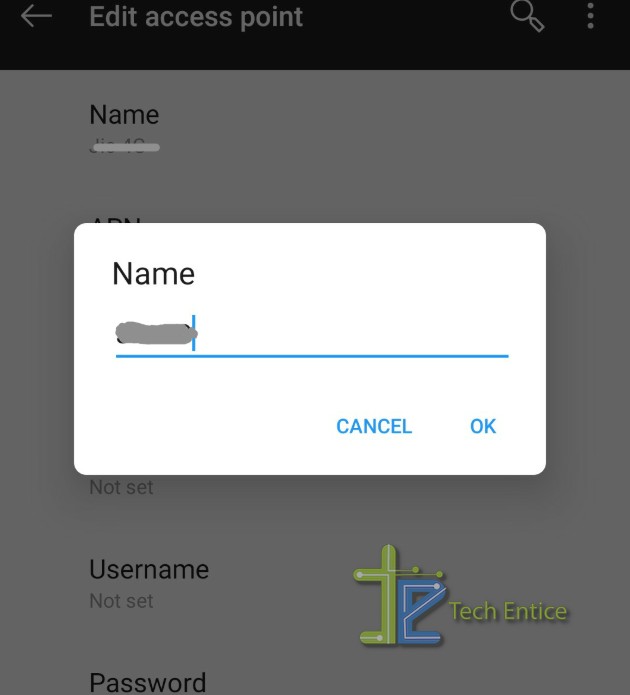
Click on the option which detail you want to edit. Change it. Click OK. apn-5.jpg
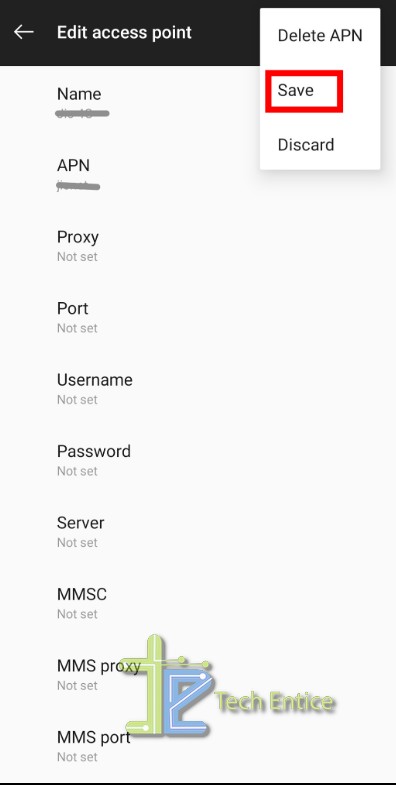
Now Click on the ‘three dot‘ at top right corner of the page’ ‘Edit access point’ to save the changes or to discard the changes or to delete the ‘APN’.
To add new ‘APN‘ click on the ‘plus‘ sign at the right top of ‘APNs‘ page. apn-7.jpg

Edit access page will appear. Fill up the lists showing in the page one by one. At the top right corner of ‘Edit access page‘ click on the three dot option to save the changes.
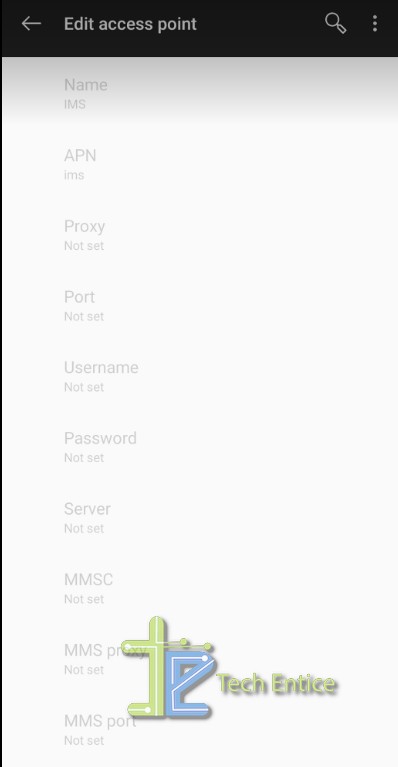
The ‘APN’ which is preloaded cannot be edited and each item on details page come in gray color.
Once APN is set to your mobile you need not change or edit it unless you reset your phone and you are completely ready to use your phone.


Leave a Reply