Every day, every hour technologies take a new face and the world keeps up with it. Obligating to this, smartphones are the most used devices which give a lot of flexibility to any kind of work. Speaking of the technologies, the need for screen recording has increased over the years and is also a demand.
Screen recording is really a thing and has its own significance. Say, for example, you are an application developer and you want to show a demo of your application virtually, you can easily use the application and screen record it, it is extremely beneficial to the end-user. It is especially great in the case of business when the customer wants to show an issue he/she is facing. Instead of explaining over a call or email, it is rather easy to show a demo of it with the screen recording. Screen recording is beneficial in cases like application training, game walk-throughs, demos, technical assistance, record lectures.
Several applications are already available for the purpose of screen recording. Even so, the new iOS (iOS 11 or later) comes with an inbuilt screen recorder that allows you to record the screen and the audio on your iOS device. Let us get on to how to use the inbuilt recorder on your iPhone, iPad, or iPod touch.
First things first, you need to allow the accessibility by adding the feature to your Control Center and then you can go ahead with recording using the inbuilt screen recorder.
Make sure you can record your screen:
Steps To Record Screen on iOS Devices
Go to your device’s settings and click on Control Center. A list of features will appear. Some with a red minus sign and some with a green plus sign. If the feature is already present in the control center of your device it will show a red minus on the left of it, while the one which is not will show the green plus sign. screenrec1.jpg
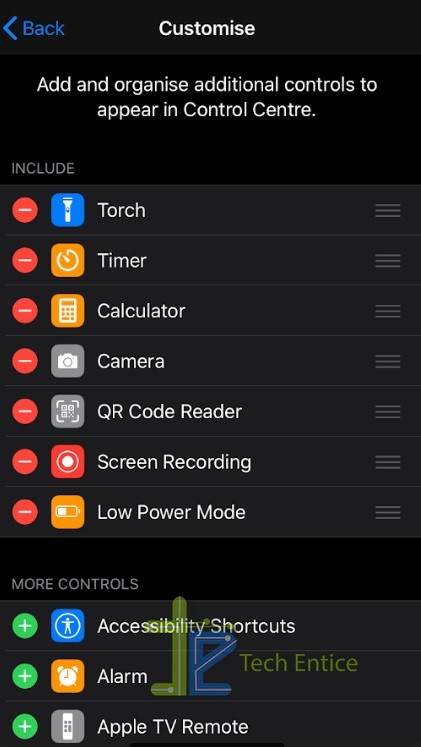
Accordingly, you can check whether the screen recording feature has been added. If not, you should tap on the green plus sign and your feature will be added.
You can arrange the Control Centre as per your convenience and can also remove the screen recording if required any time you want.
For removing, you will have to follow the same procedure as adding. Only in this case, you must tap the red minus sign.
Record your screen:
- Go to the screen you want to record.
- Swipe up or swipe down to view the Control Center.
- You will see the record icon as added and arranged by you while adding it to the control center. Tap on the record icon.
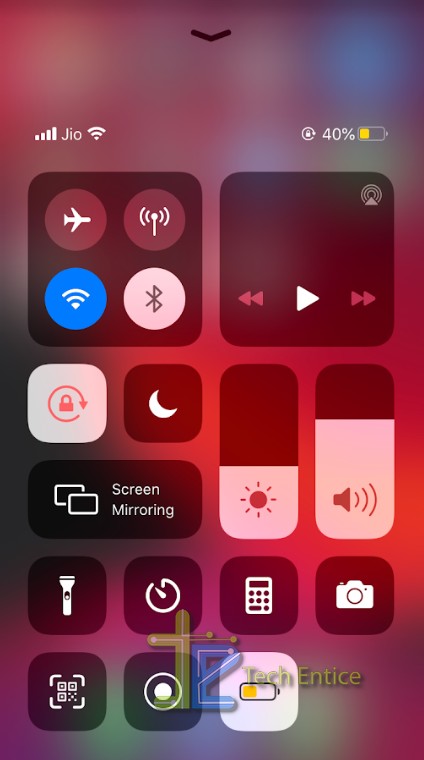
If you just tap the button it will go on with recording. But if you deeply tap the record icon, it displays an option, asking you to allow turning on the microphone or not. You can tap on the Microphone icon and then tap, Start Recording. It will start recording along with the audio after three seconds of wait.
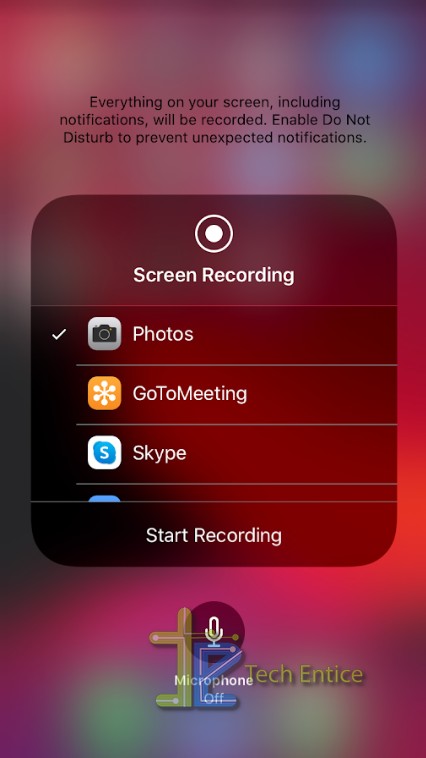
To stop the recording there are two ways. The easy way would be clicking on the red status bar on the top of your screen. Alternatively, you can go to the Control Center and then tap on the record icon to stop. In both cases, it will display a dialogue box asking if you want to stop screen recording. You choose “Stop” and you are done with the recording.
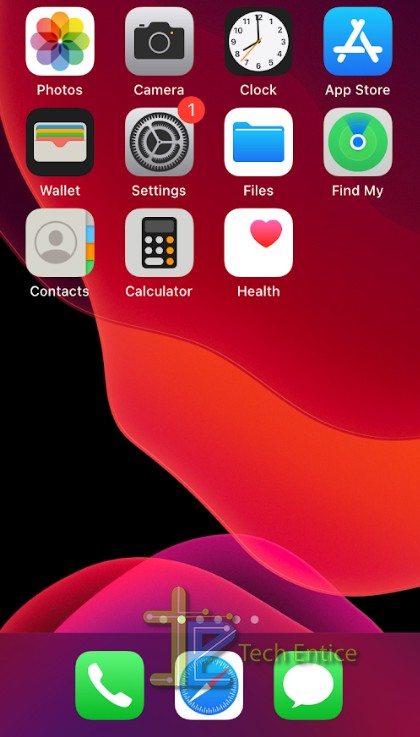
Along with screen recording, you have the option to edit the same as well. You will find the recording in your Photos app in the Camera Roll. You can edit the recording by clicking on edit and use the various features available to create a newly edited version of the recording while the original one stays as it is.






Leave a Reply