The purpose of USB debugging is to ensure that you can flash your device, transfer any data from your Android phones to your PC and vice versa with no restrictions. Many a time, there are situations when the Android phone has suffered a data loss and requires restoration or repairing only via third party apps on desktop PCs. Or, you may need to transfer chats, text messages, retrieve deleted text messages from your Android phones using third party apps. In such scenarios, the Android operating system does not give permission to do so, unless you turn on the USB Debugging mode. Here, one important thing to keep in mind, is that, USB debugging is actually used to bridging a connection between the Android device to the Android Software Developer kit using USB connectivity. So, you should not fidget with these settings unless you are particular about your requirements.
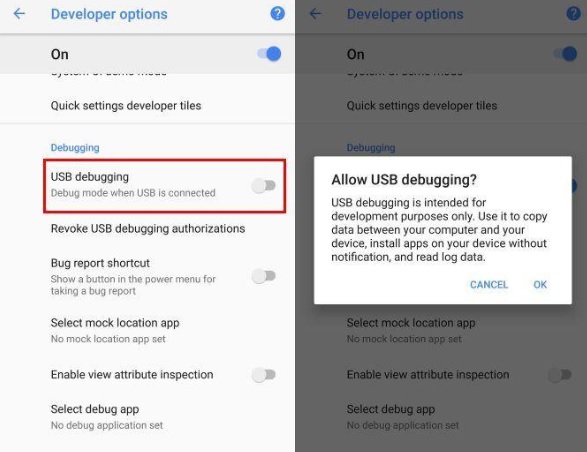
As Android says, USB Debugging is intended for development purposes only. Use it to copy your data between your computer and your device, install apps on your device without notification and read log data.
In the following tutorial, you will learn how to Enable or Disable USB Debugging on Android devices.
Steps To Enable Or Disable USB Debugging on Android Device
1. First, you have to turn on the Developer Options. For that open the Settings app, go to About Phone.
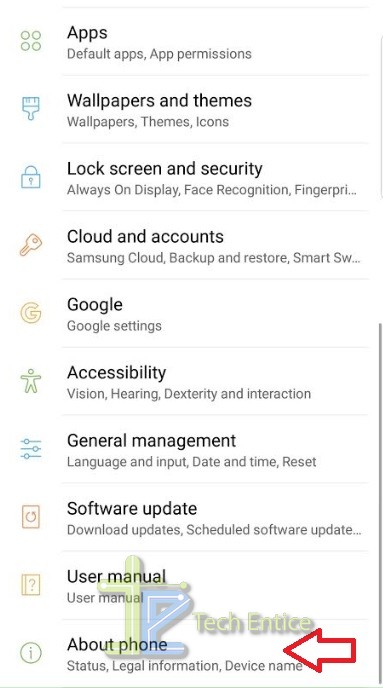
2. Next, tap on Software Information. Then as the software information opens, scroll down and find out Build Number.
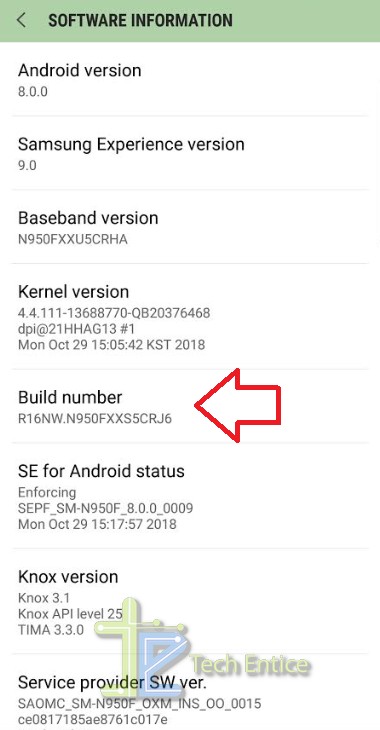
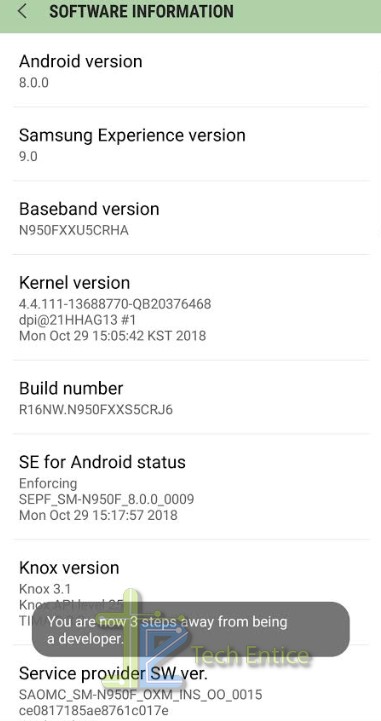
3. Tap on the Build number 7 times to enable the Developer Options.
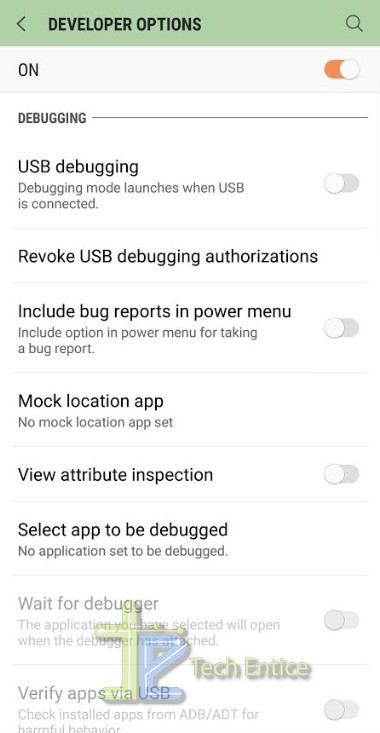
4. As Developer Options get enabled, you can find it below the About Phone section. Tap on it to open it. Now scroll down and find out the option USB Debugging. Tap on the slider to turn it on. It will ask for confirmation. Click OK to continue.
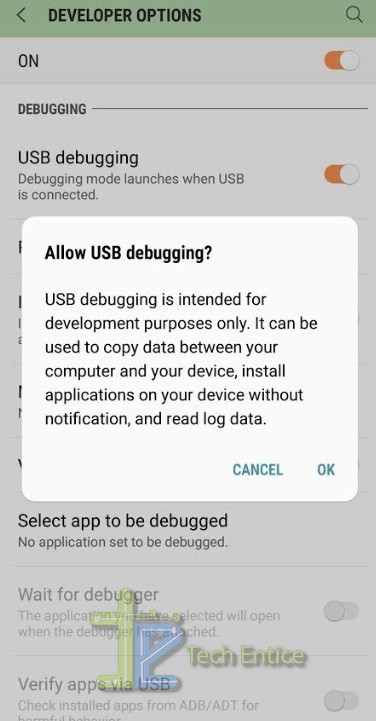
5. USB Debugging is turned on. If you want to turn off, simply tap on the slider once again and it will be disabled.
Recommended: How To Turn Off Developer Options On Android?





Leave a Reply