Deleting a post on Facebook may night be a big deal for many of you. But for many new users and senior persons, it is indeed a big deal. There is an article on our site how to delete a post from Facebook. Check it out also. Before, deleting a post from Facebook meant deleting the post forever. But now, Facebook has added a Recycle Bin option. When you delete a post, it remains in the Recycle Bin for 30 days. Within this 30 days, you can restore the deleted item from Recycle bin, or delete it permanently.
In this article, you will learn how to permanently delete a post from Recycle bin on Facebook.
Also Read: How to Delete a Post On Facebook?
Steps To Permanently Delete A Post On Facebook From Recycle Bin
1. Tap on the three vertical dots, located at the top right corner of the post.

2. Now, select Move to Recycle Bin.
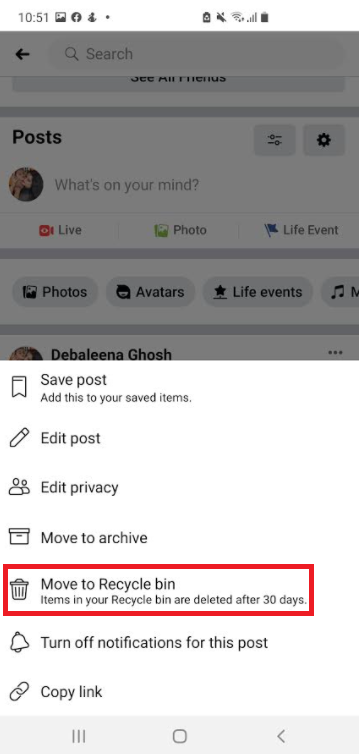
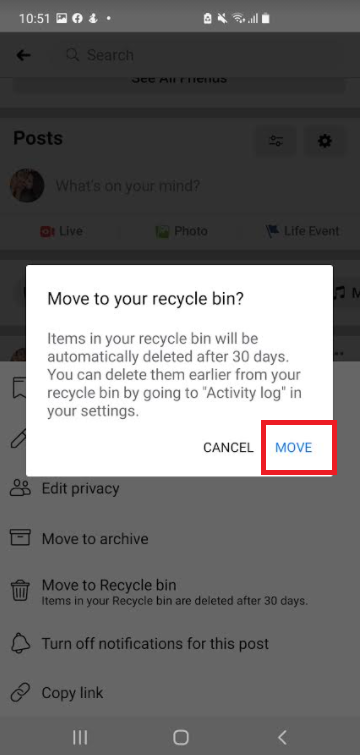
3. Facebook will prompt you if you want to move the item to Recycle Bin. Tap on Move. Your post will be moved to Recycle Bin. The deleted post will remain in the Recycle Bin for 30 days, after which it will be automatically deleted.
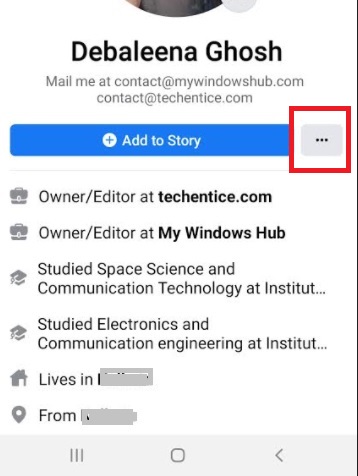
4. Now click on the three vertical hyphen located at the top right corner of the app page and go to your profile page. Now tap on the three dots as shown below
5. Tap on Activity Log.
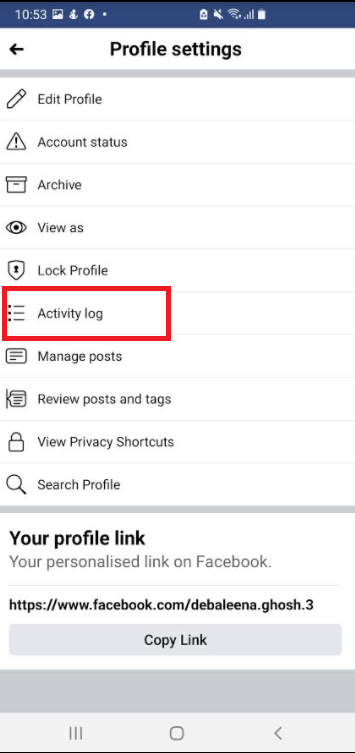
6. As Activity log opens, tap on Recycle Bin.
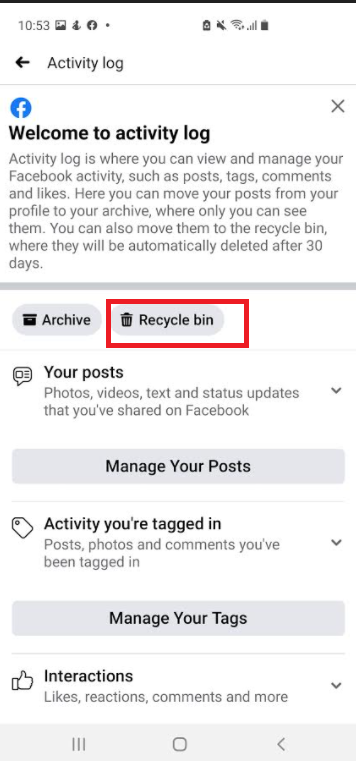
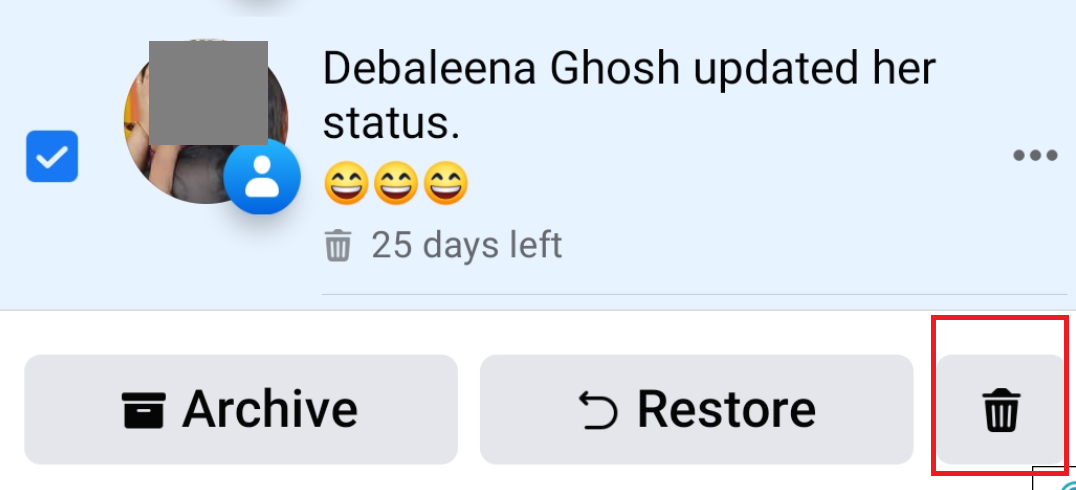
7. As Recycle Bin opens, check the box beside the post you want to delete permanently. Then tap on the Bin sign. Your post will be deleted.
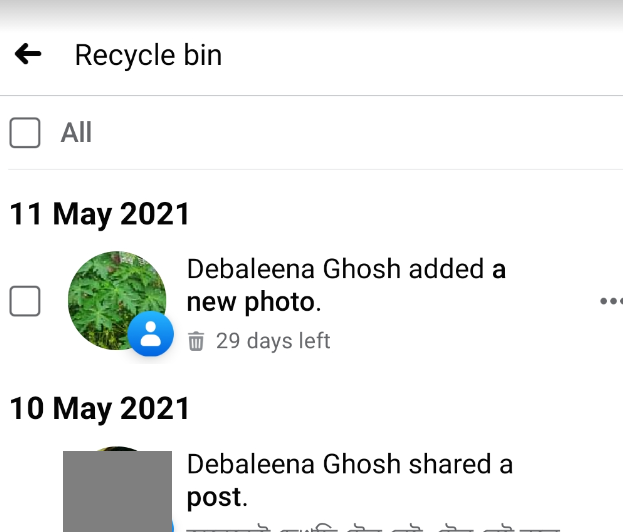
OR, If you want to delete all posts from the Recycle Bin, check the box beside “All” as shown in the screenshot.

8. Now tap on the Bin icon.
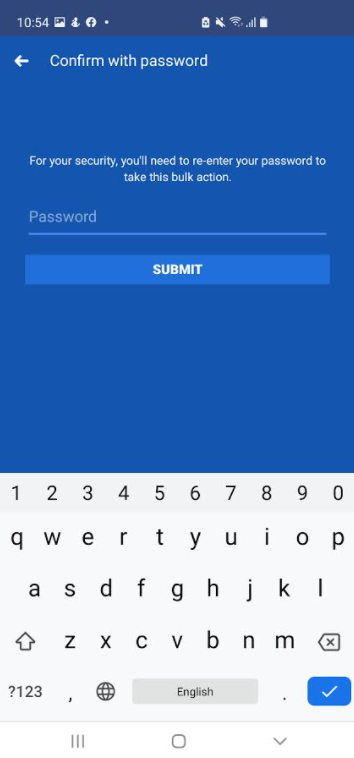
9. For deleting all posts, you may be required to enter your Facebook password. Do that and confirm.
That’s all!





Leave a Reply