The process of converting printed photos or what we say hard copies and documents , into digital formats has become so easy. Previously, only scanning was an option for users. So, unless one had a hefty scanner, it wasn’t possible to convert a printed file to digital image. Now with in-built cameras teamed with great scanning apps have mitigated all difficulties associated with printed to digital conversion.
macOS Mojave has brought Continuity Camera to its ecosystem. You can use Continuity Camera to import photos or scanned documents to your mac using your iPhones or iPads. The continuity camera connects your Mac with your iPhone/iPad. You can capture photos using your iOS device and import directly into a file that you have created on your Mac.
First have a look at the software specifications of supporting Continuity Camera:
- Compatible macOS and iOS versions are macOS Mojave. iOS device: iOS 12.
- Continuity Camera is compatible with the Mojave bundled apps like Notes, TextEdit, and Mail.
- It is also compatible with Apple’s Pages and Keynote.
- One important condition is that your Mac and iOS devices must be logged in using the same Apple ID as well as connected over the same Wi-Fi network.
Steps to take photos using Continuity Camera in macOS Mojave and iOS 12
-
- First of all make sure that both your Mac and iOS device are connected over the same Wi-Fi network and that Bluetooth of both devices are turned on. Login to both the devices using the same Apple ID.
- Now, go to Launchpad and open the Pages application.
- Click on Pages option just beside the Apple icon at the top. Click on New and create a new Page.
-
- Now take the cursor to the line where you want to insert the image or the scanned document.
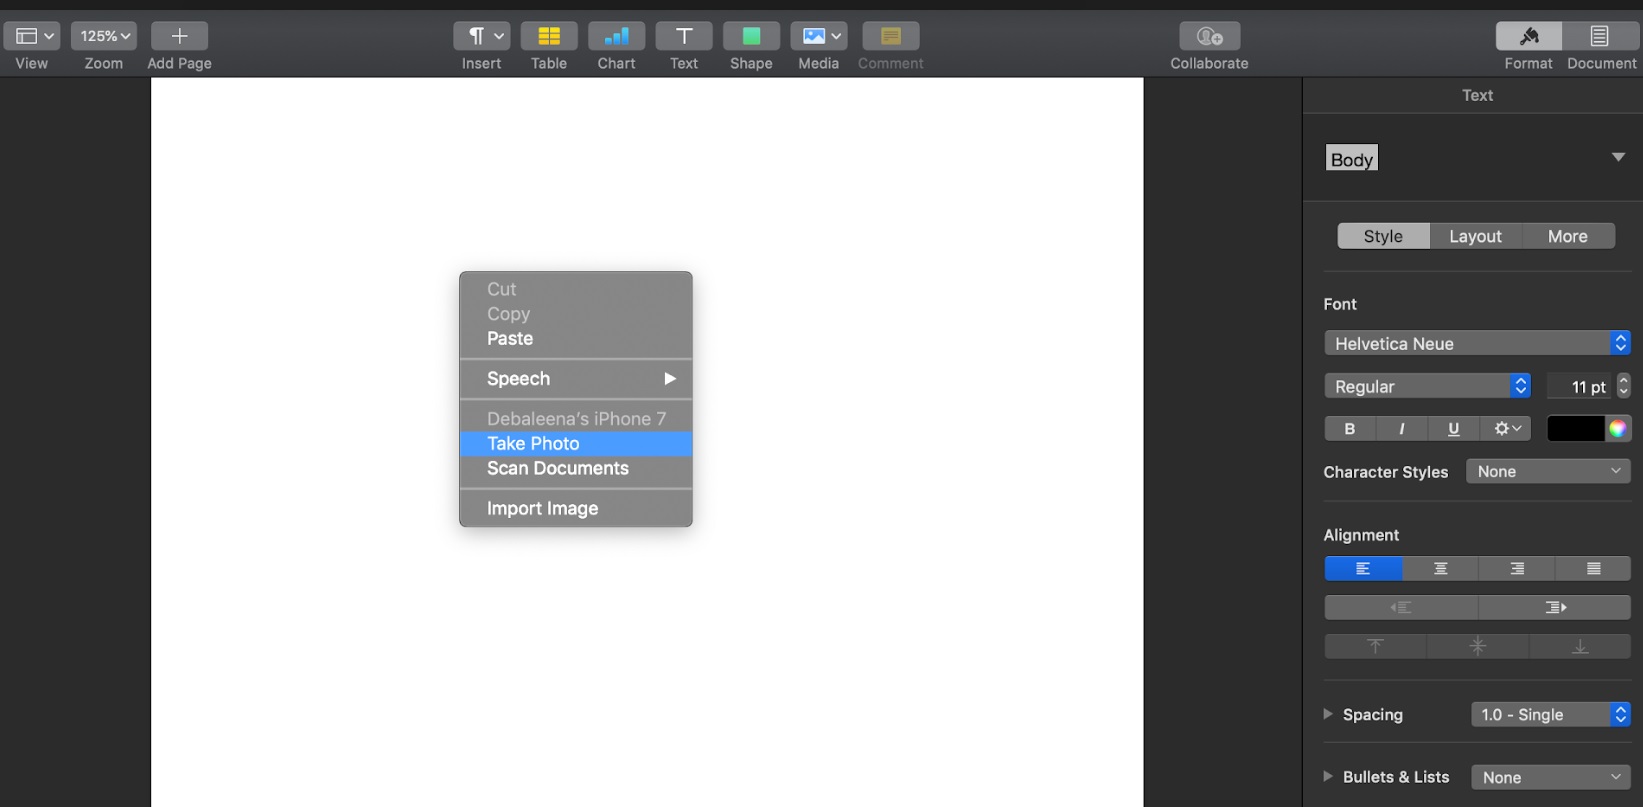
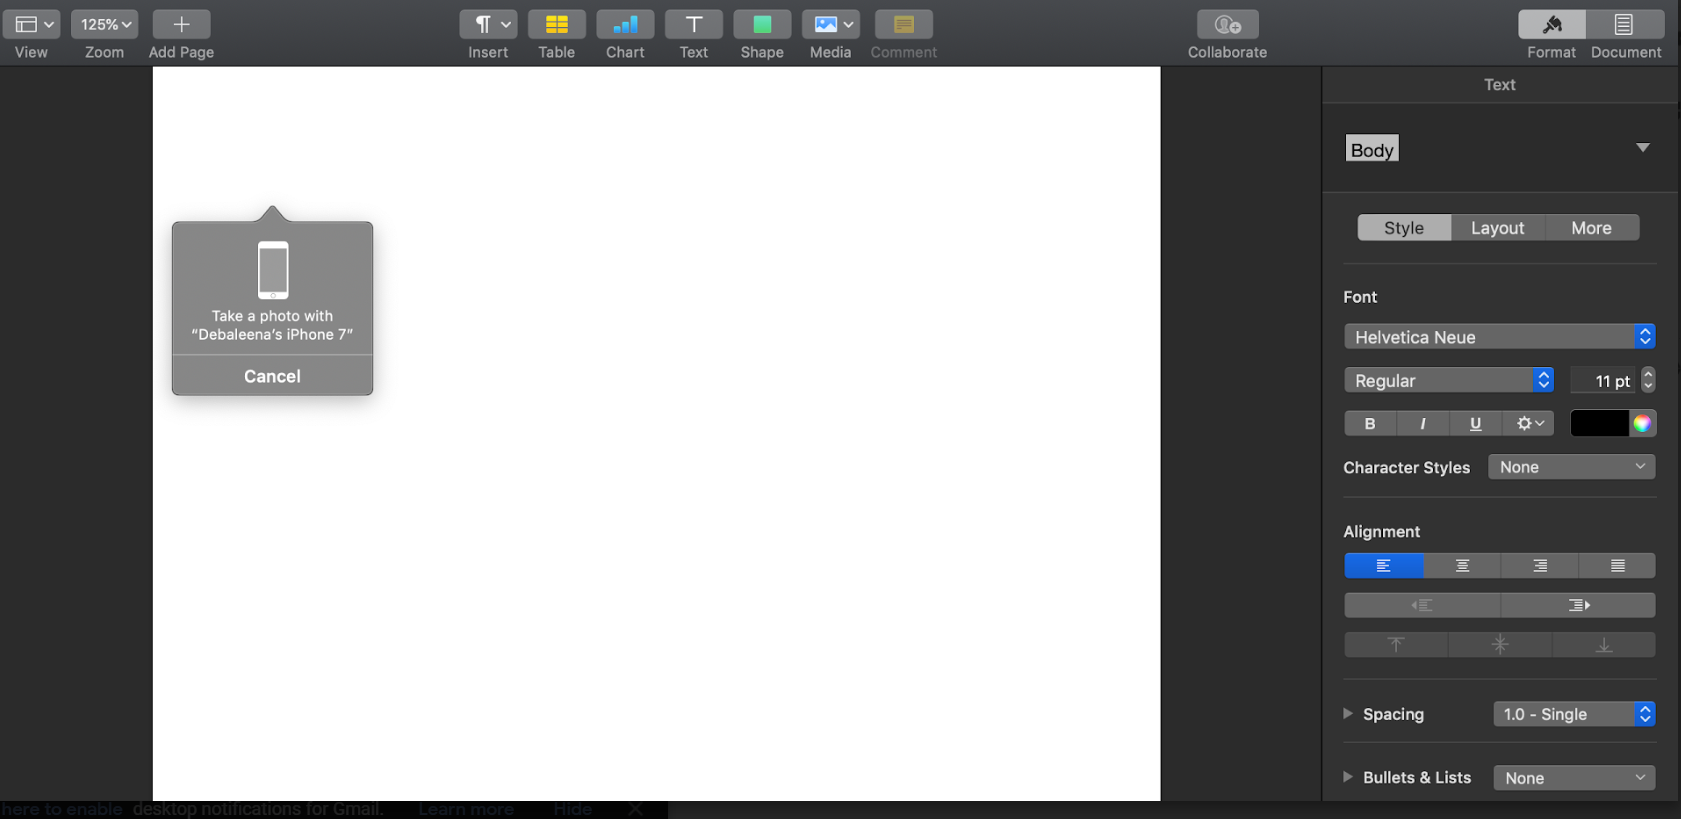
- Now, right click on the empty space in Pages and click on Take Photo (if you want to take photo) or Scan Documents (if you want to scan documents). As soon as you select the option, the camera will open on your iOS device and you will get the same notification on your macOS Mojave.
-
- Take the picture. When it is done, click Use Photo. If it is not captured properly then recapture. When you click use Photo, the photo will be inserted directly on the Document file.
\
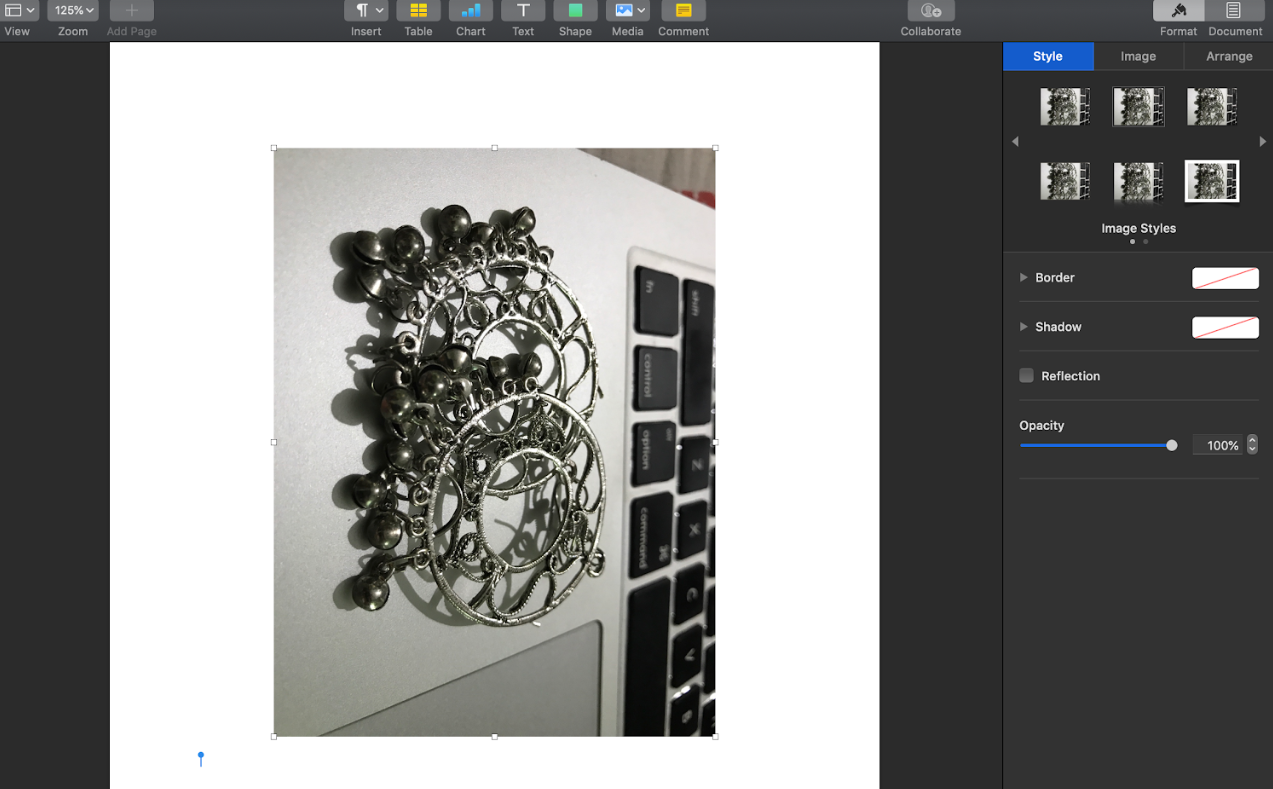
- In this way, you can also insert images directly on Mail, Notes, and all the aforementioned applications.
That’s all! Hope the article has helped you. Check out the latest improvements on Finder with macOS Mojave.




Leave a Reply