Wrike is a project management software that aims to provide you with excellent project management tools by integrating work discussions, email, and to-do lists with several interesting team-enhancing features. Integration of email with projects is an important aspect of this software because most online software for project management lack this feature, forcing managers to continue tracking project milestones with weaker tools such as email and spreadsheets.
To begin, you need to go to https://www.wrike.com
https://www.wrike.com and click on “Get Started.” You have to register with Wrike by filling up the registration form. Next, you will be required to confirm through your email.
Once you are registered, the software application will prompt you to specify the type of company you have, your role in your organization, and the names of your team members. There are five plans for Wrike software: Free, Professional, Business, Wrike for Marketers, and Enterprise. You can select one of the five available options. Next you will be taken through a tutorial about using the software. The tutorial is well-designed and is an important first step for any new user.
Some of the important features in this web based app for work management include: interactive Gantt charts, subtask management, advanced data filters, and shareable dashboards. The Gantt charts provide the best way to keep track of the work being done and the progress of the work. It’s a visual timeline that lets you view your project schedule and set dependencies in real time with easy adjustments to keep your team on track. The resource management feature helps you balance your resources and track performance of your team via a workload view. An open view of team workloads makes it easy to recalibrate schedules and tasks when necessary. Time and budget tracking is another important feature which helps you record how much time each task took.
The main steps for using the software are:
1. Create a project
2. Create tasks & assign them to teammates
3. Manage the tasks in a project
Create a project
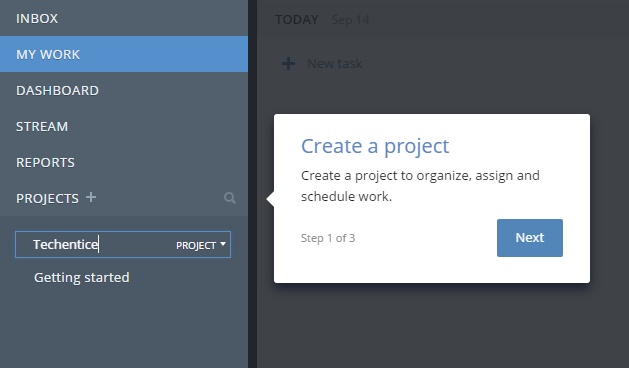
Project creation is the first step when you need to create a new project and name it. This is basicalkly a container for all the various tasks that make up a project.
Create & assign tasks
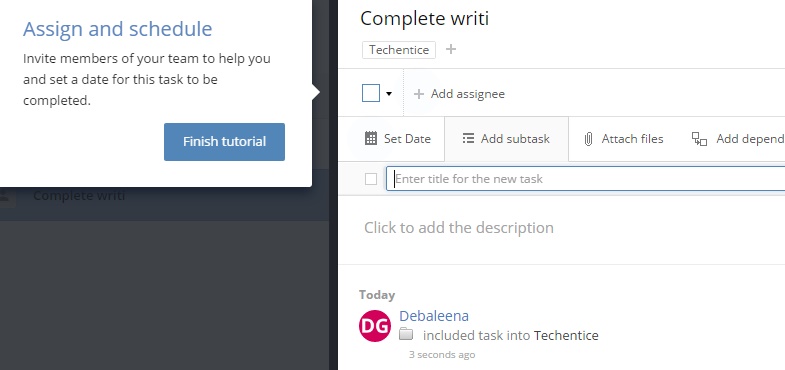
Next, you need to add tasks to your project. There are several view options available for this step: lists, tables, stream. Click on the ‘plus’ sign to add a new Task. Then name that task contextually. You can then appoint an assignee or the worker who will complete the task. You can set the due date, attach support files, complete the description for more context and more. The features included in the task field are unambiguous and leave no doubt for new users. So in terms of user interface, the app is wonderful and user-friendly.
Manage the tasks
When your tasks are all laid out and assigned, you can also choose to manage these tasks. One way is to open the tasks in the timeline view to see how each task’s deadline looks when mapped to specific dates.
Wrike provides you with the ability to explore other tasks, follow the progress specific tasks, and even to create custom Dashboards to track all the tasks that are important to you. You can sort through tasks by using search filters and save these search results as a custom dashboard widget so you can easily view progress. The software contains several video tutorials which clearly define the types of functionality Wrike offers.
The Wrike software offers a free trial version which is valid for only 15 days. After that you need to buy the paid versions. Based on the experience with the trial version, Wrike is an extremely helpful application that leverages a methodical and systematic approach to work, and is apt for employees of any organization. The app is powerful and I leave you to explore through each and every detailed feature of the software. This may seem a bit confusing at first but as you keep using it, you will understand hold every functionality.





Leave a Reply