Windows 7 includes a lot of extra security features to help users to keep their data safe. Even without knowing your Windows password, intruders can easily gain access to files and passwords stored by Windows. The only way to protect your data is by using encryption. You can encrypt select files, but to protect your system files and saved passwords, you must encrypt your entire hard drive.
BitLocker offers protection for all of your personal files and documents, as well as for all of the system files and cached or saved passwords on your drive. If you are using Ultimate or Enterprise editions of Windows 7 you can use the feature of Bitlocker. Here I will show you how to use Bitlocker.
Steps to use BitLocker in Windows 7
1 Go to Control Panel, click on System & Security.

2 Now click on bitlocker Drive Encryption Option.
3 Select the drive you want to encrypt using Bitlocker.
4 Select a method that you will use to unlock or decrypt your hard drive in the future. Tick the “Use a password to unlock the drive ” box, enter a password of your choice and click the “Next” button.
5 Select a method to save your recovery key.
Note: You can use this recovery key in case you forget your password.

6 The printed recovery document should contain 3 sets of numbers as shown below:

7 Click the “Start Encrypting” button to start the encryption process.
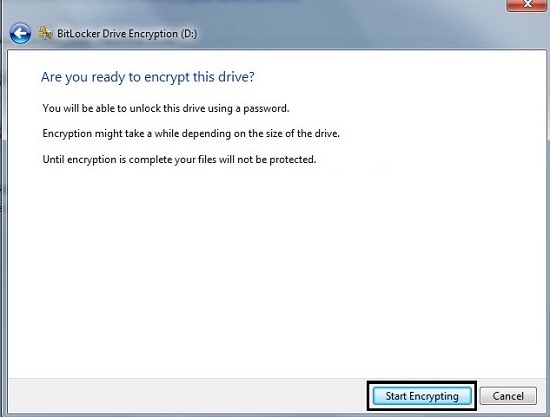
8 The encryption process should begin as shown below :

9 After the encryption process is done, the user will be prompted with a message stating encryption complete. You should see the main screen. It should show you a lock and key icon which replaced your flash drive icon. In addition, there should now be an additional option to the right of the icon named “Manage BitLocker”. Your drive is now encrypted.
Next time when you want to access the drive that has been encrypted, you have to unlock it using the password you had provided during the encryption process.



Leave a Reply